Friday, September 26, 2014

{Baby}: Diaper Bag Decisions.

You should know that I research. I research purchases. I will read Amazon reviews, scour the web, and then pounce on something when I see it because I've thought ahead and know exactly what I want. It is just how I am.

Additionally, I don't like spending a lot of money on something. I know that there are things that you should spend money on (and when it comes to safety I do spend money) but a bag to me just isn't something I want to spend money on.

But then it isn't just a bag. It is RUTHIE's bag. And then I get all sentimental and gooey and want the best and cutest for little Ruthie.

So I had some choices/thoughts...

After researching, reading, trolling the interwebs, scoping out the bargains, I came up with five sensible options:

Each very different, the major things I looked for in basic bag needs were insulated bottle pockets, interior and exterior zip pockets, ability to carry on shoulder, and ratings/reviews. What I needed to figure out, once I narrowed it down, was what style really was "me" for my Ruthie bag.

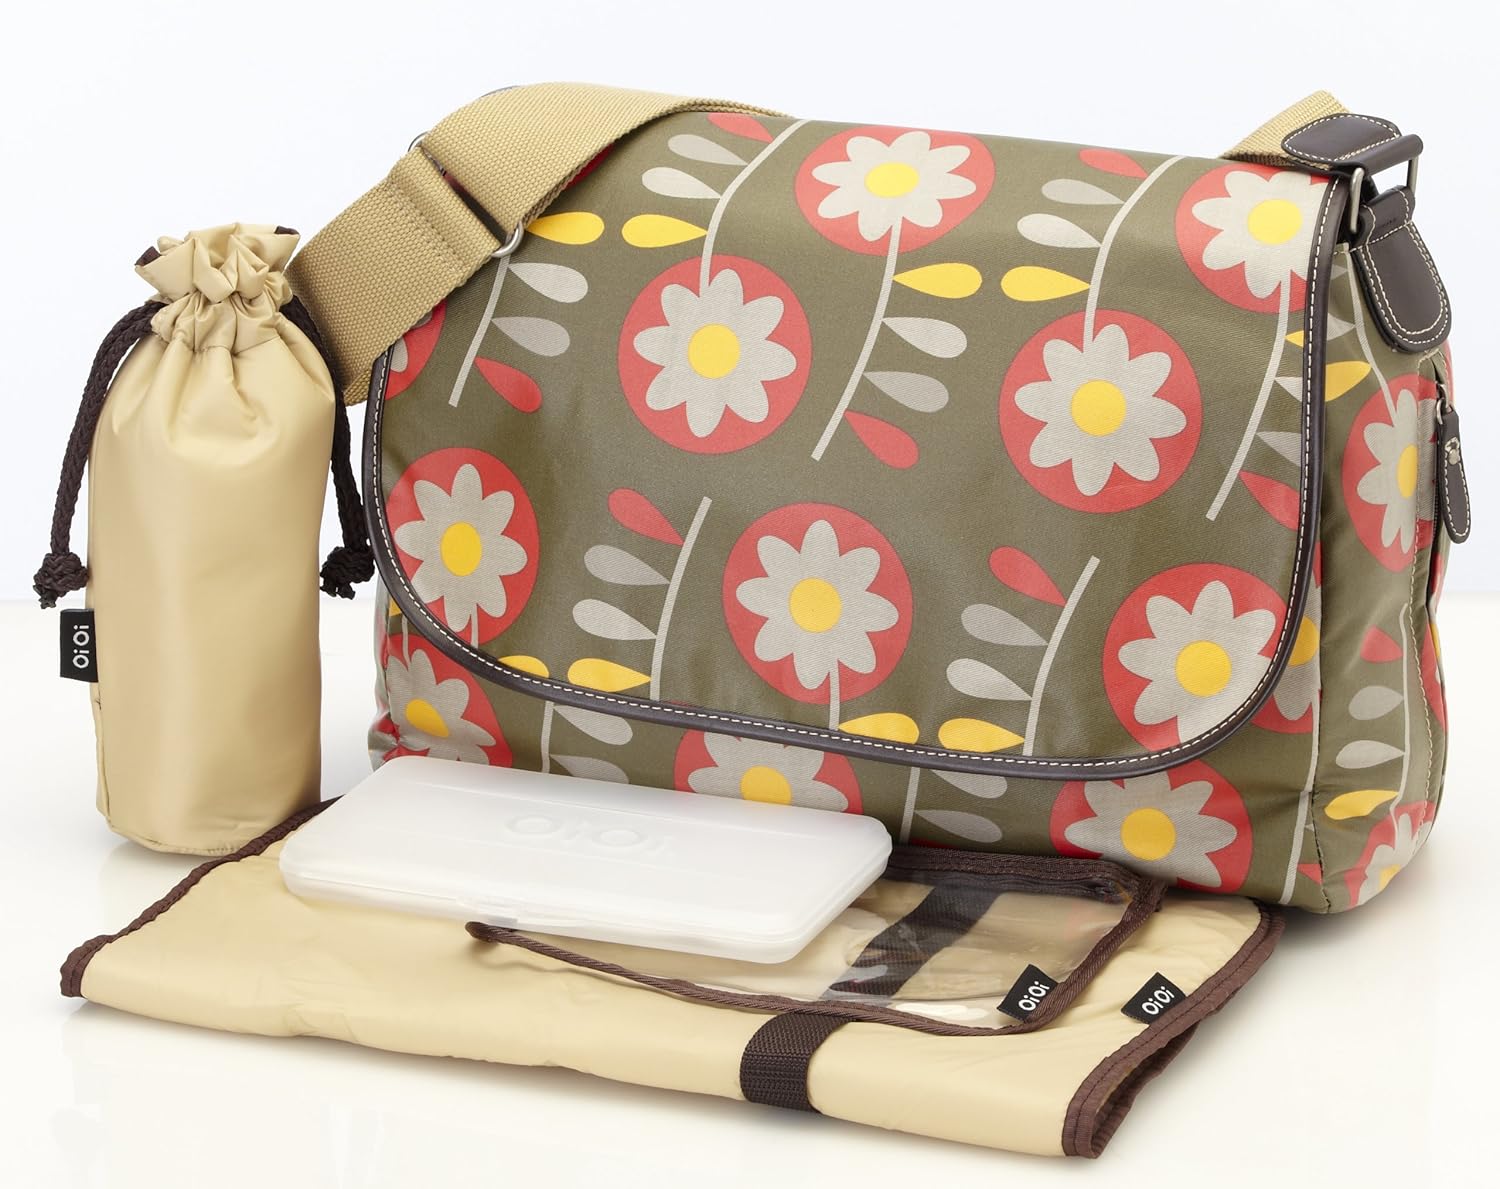
I liked the Skip Hop Chelsea and the Beeba for their sophisticated look. I liked the JP Lizzy for being the non-diaper bag. I liked the Skip Hop Grand Central for being colorful but business. And then there was the OiOi Messenger. Even though I had been anti-pattern the whole time, this pattern screamed girly but sophisticated to me. And I actually liked the messenger look for a diaper bag. I was pretty surprised to be leaning towards the OiOi.

And then fate intervened. Overstock.com didn't have any reviews of the OiOi bag, so I looked on Amazon. Not only did they have reviews, but the bag was down from $120 (original price) to $39 (Amazon price), which was better than the $89 price from Overstock. All things considered, it seemed like something I had to jump on!


I put the OiOi bag in my cart and then decided to turn my attention towards Jake's diaper bag. With such a girly print, I knew he'd need his own. Plus, Sheryl Sandberg says in "Lean In" to make your partner an equal, so he needed his own.

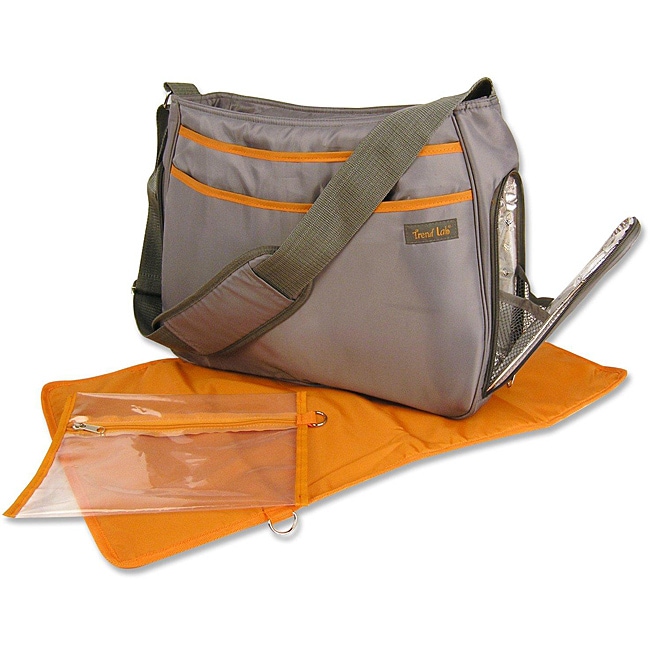
Originally, I considered the Skip Hop Messenger for him but during the Great Diaper Bag Search of 2014, I found the Trend Lab Ultimate Diaper Bag, which included great reviews, a $29 price tag, and came in UT colors (grey/orange):

So, folks, that's how I managed to get two diaper bags in one night, moving from frozen indecision to in the mail with the click of the mouse. And in the process of researching and jumping on what I saw, I got both bags for less than I would have paid for one!

In preparing for Ruthie,

post signature

Sunday, September 14, 2014

{Go There}: Greencork.

 Recently I tried out a new, hip spot in town - vicariously. See, when Chandler wanted to go to Greencork for her birthday, I knew I couldn't completely engage in the fun - Greencork is a self-service wine bar - but I was excited for the experience.

Greencork is in Cooper Young and is a great size - big enough to get a table but not get too loud/crazy. There are three different self service stations. Upon arriving, you exchange your credit card info (like creating a tab) for a kiosk card. You get a glass and take your card to the various wine stations. Each station has 6+ bottles of wine and the stations are based on similar palates. Above the wines are information about the bottle. We met the owner and "wine curator", or "fairy wine mother" as she referred to herself, and she told us all about her favorites.

The wine pours come in 2, 4, and 6 oz selections, all with prices for that particular wine displayed. We priced it out and the price per ounce is comparable to a restaurant, so not a bad deal. You could get a full glass of a delicious wine or you could sample 2 oz pours of a lot of different things.


When it is time to select, you put the card in, press a button, and wine pours into your glass.

Greencork also has a great food menu - we had Sweetgrass for dinner so we didn't try it out but many people in the restaurant were clearly on a date/friend dinner with food and drinks.


Definitely check out Greencork - I love the concept and think it is exactly what Cooper Young needs. There were a variety of people in the restaurant, young and old. When Ruthie arrives, I told my friends that my first night out is going to be a celebration at Greencork and I'm going to make tasting cards for us all to try out different wines. You can find the wines in stores, so if you find one you love, why not remember it so you can buy it later?


You should definitely go there - 2156 Young Ave. :: Memphis, TN 38104 :: 901.207.5281

In friends and wine and having fun,

post signature

Wednesday, September 3, 2014

{Nursery}: Conquered Closet.

Back in July I blogged about our closet configuration possibilities for the nursery here. Using the Rubbermaid website and Pinterest, I did a lot of researching for the ideal closet setup for Ruthie's nursery. My mom had two Rubbermaid Closet Configuration kits from another project that she so generously donated to our cause...

I snapped this photo of the box as an example of what we'd want to do:


Here's what the kit included - we had two kits:


Configuration ideas. None for a little person closet though...


The before - we cleared the old closet rod/shelves out before the nursery was painted, leaving a blank slate:


Ruthie's favorite uncles (my brothers) came over to install the closet system. Note the headlamp...


Brothers with the (almost) finished product. I had to go get one more bracket and long shelf.


And her closet! Two long shelves on top, a half rod, a full rod, two short shelves, and another long shelf. I think we'll use the bottom of the closet for either a long storage bin or laying down our stroller for storage. We got new fun knobs for the closet from Hobby Lobby (white with polka dots). As you can tell, she's already got some clothes... I can't help myself!


More progress on the nursery to come!

In little clothes,
post signature

Tuesday, September 2, 2014

{Home}: Den Renovation... almost done.

Back in July we embarked on our last big home renovation of this house... our den. If you've been following along, we've had this on our list from the get-go and when we did the kitchen, we knew it was only so much longer before we'd finish off the den (they are connected). In fact, in our "finished" kitchen pictures, you can see that unfinished den staring you in the face...


So when we last checked in, from this blog post, our contractor had ripped the den down to the studs... Taking our den from painted paneling and carpet to a construction zone.

We gave our massive sectional to Jake's brother - here's Harley and Tyson saying goodbye to it before it was hauled away.


While we did the den, we also had the front two bedrooms (nursery and guest room) painted so the living and dining room became quite the maze!


An almost empty den. Goodbye paneling and carpet!


One last panorama of the fugly den:


Originally we were going to take out these windows and put in french doors and replace the back door with a window to create an eat in kitchen nook but ultimately we decided it wasn't financially sensible to put so much money into this house, so the project became much more manageable in scale.


We did decide at semi-last minute to open up this door. Once the paneling was down, our contractor discovered that it was pretty feasible (we weren't sure about the load-bearing factor or where those vents went). So once he was in the wall, he said it was pretty easy and we moved ahead.


Demo day one revealed that a window from our guest bedroom to what used to be the porch (this den is an addition from the 1970's).


Beamer checking out the progress - note that sweet green linoleum that was under the carpet.


End of day one. You can also see where the second addition (our master bedroom and bathroom) start (with the insulation and different framing)- that was probably early 80's.


Here's a picture of the new passageway, widened by about a foot on each side and several inches up top, framed out:


The new view of the back windows with their new insulation.


Dogs enjoying the renovation progress. One thing you'll note in the background is we rewired all the electrical in this room (see the blue box in background).


New drywall going up -


Bassets and power tools:


The end of week two brought our flooring installation - which was not without drama. We thought we couldn't get the same yellow/white floor from the kitchen project but luckily we found it. For future record, here are the colors:


Love the seamless look from kitchen to den now:


Walls and trim were painted as well- walls are Crushed Rock from Sherwin Williams. New white electrical plugs and switches.


Once all the trim was painted and new lighting installed (fan and schoolhouse light kit from Lowe's), we cleaned and waxed the floors with Armstrong cleaner. The floors are VCT like you'd find in a school or hospital and we have had them in the kitchen for four years and still love them.


Back door painted black - new security door to be installed (no more oak leaves!):


With the floors cleaned and shined, we were able to put our new rug and couch in the den. Rug was a remnant from Kiser Flooring that they bound, couch is from I O Metro on Ridgeway.


We still have progress to make on putting art back on the walls but we did find two side tables for the couch this weekend! I wanted something with drawers that was mid-century modern-ish. Found both from my favorite, Antique Warehouse on Summer Avenue.


So while it still isn't "done," I'm calling it close. Here's to what new drywall, paint, and floors will do to a room!

Before -

Almost done -

In home ownership's joys,

post signature

LinkWithin

Related Posts Plugin for WordPress, Blogger...
 
Site Design By Designer Blogs